
Now that we're all adults and receiving gifts is no longer the pinnacle of our Christmas celebration, my family has downsized to a secret Santa-variety exchange. This year I picked Danielle, my brother's fiance, out of the hat.
Naturally, I procrastinated until the very last moment. I wasn't sure I had the time to make her something, so I turned to Etsy. This shop caught my eye and I placed my order. Much to my dismay, I received an email from the seller to say she couldn't promise it would arrive by Christmas and all my plans were foiled! So I said, "Screw it. I'll make one myself!"
Pros: I could personalize it with my own symbolic botanical choice; an olive branch, as well as the colors of my choice to suit Danielle's complexion.
The olive branch: a symbol of peace that dates back to Ancient Greece; traditionally worn by brides to symbolize a peaceful married life. It is a symbol of Danielle's humanitarian dedications, a symbol of peace between Danielle and I, and a symbol of peace in their upcoming marriage.
Cons: How the hell do I make a pendant out of an embroidered swatch?
 |
| The finished pendant |
I began by researching botanical illustrations of the olive tree, using these two as my primary source material.
 |
| Illustration by Sally Petru |
For my fabric, I chose a pale, blueish-gray wool. It was the perfect color; wool was an ideal fiber for its resilience and flexibility; and it conveniently happened to be the leftover accent fabric from a suit I made for my brother a few years ago, giving it additional symbolic heft.
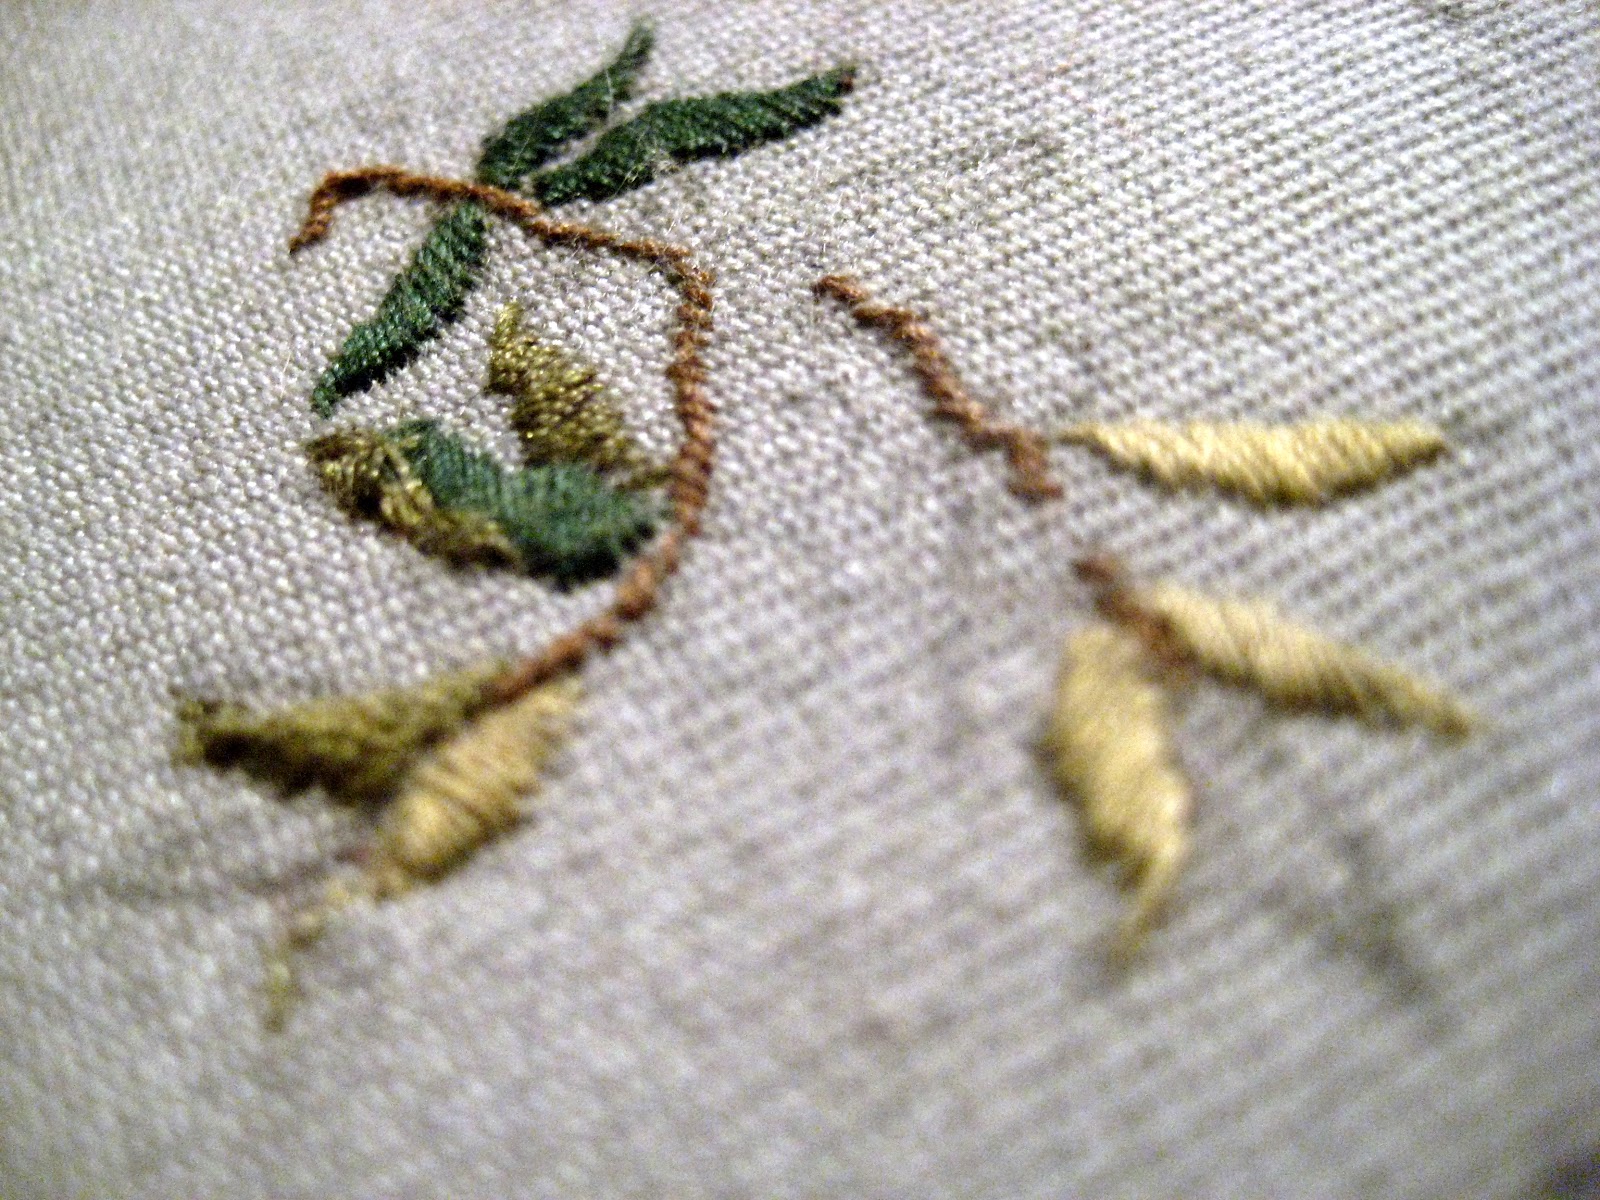
I stretched my fabric in an embroidery hoop, and using my image source for reference, I sketched an olive branch lightly in pencil on the fabric.
Due to its size, I used basic sewing thread (rather than embroidery floss), leaning more heavily on the polyester and poly-silk threads for a shinier finish. For greater control, use a single thread, not a double thread (after threading the needle, knot just one tail end, rather than knotting both tails together).
 |
| Threaded and knotted needle |
 |
| Pencil drawing with the first bits of embroidery |
Now, I don't have any formal needlework experience, so I mostly made it up as I went along. Really I just used my thread to carefully fill in the shapes I had drawn out. For more detailed instructions on embroidery, there are plenty of excellent resources to be found online, including instructional videos on YouTube. The following are a few photographs documenting my progress.


To transform my embroidery into a pendant, I got the brass setting for a few dollars in a bin of secondhand odds and ends in Williamsburg jewelry shop, Brooklyn Charm. Anyplace that carries jewelry making supplies should have some variety of setting one could use for a project like this. I was very lucky to find one the perfect size for my embroidery, but certainly it would be a better idea to find your setting before you start your embroidery.
I cut a circle out of some heavy-duty chipboard I had lying around to fit inside my setting (with extra room for the fabric). The chipboard worked well for me, but if you don't have any around I would consider your other options. Metal or wood would be more durable solutions, but your primary consideration must be the construction of your setting.
I then cut out my embroidery, leaving a seam allowance of at least 1/4 inch. I cut a circle of the same size out of a backing fabric (I used a dark gray silk). I machine stitched around the edge of what would be visible of my embroidery and backing, serving as a barrier to keep your fabric from unraveling when you cut into it to fit it snugly around the back of the chipboard. I next glued my embroidery to the chipboard with craft glue (I recommend Sobo) and clipped triangles out of the seam allowance so that it would bend around the back of the chipboard and lay flat. I slipstiched the backing to the wool around the edge of the circle. This stitch should be invisible when done correctly, however, my setting covered this edge, so it was forgiving of flubs. Finally, I applied a thin line of glue around that edge and inserted it into the setting, sealing the stitching and securing the embroidery in place within the setting.
Chains are very easy to assemble. All you need is some chain (purchasable by the foot at any jewelry supply store), jump rings, a clasp, wire-cutters, and needle nose pliers.
 |
| Jump rings on upper left-hand corner |
Simply cut chain to desired length and connect pendant and clasp with jump rings. When opening and closing jump rings, never disturb the integrity of the circle by pulling the ends apart. Instead, open and close the ends of the ring laterally.
To round out Danielle's gift I did my own botanical illustration in Prismacolor colored pencils and Pigma Micron pen. My primary source material for this one was this image, a 19th century illustration by Franz Eugen Kohler.


I think my high school art teacher would be glad to know I've finally embraced calligraphy, after all the grief I gave her over our illuminated manuscript assignment. Using my new favorite calligraphy pen, I penned a message on the back of the card and addressed the envelope (handmade from re-purposed magazine pages).
 |
| Front of envelope |
 |
| Back of envelope, sealed with a monogram (gold ink on black gaffers tape) |
The finished necklace was set on a bed a recycled decorative paper in a re-purposed box, wrapped in magazine pages and topped with a bow made from the excess strips of magazine page paper.

Warm wishes for a happy holiday season!
Melody
Your talent continues to amaze me.
ReplyDeletelove you,
mom