Showing posts with label crafts. Show all posts

Thursday, November 29, 2012

Dream Tote!

I have a lot of stuff. Too much stuff. Especially in my closet. A year or so I had a revelation concerning all this stuff. A lot of it I rarely wear or use, but when I try to get rid of these things I can't. Why? Because they still serve a purpose or fill a hole. You need to fill that hole with one beautiful, well-made item so that you can get rid of a host of sub-par items that have been serving that purpose together.

For example, my tote bag situation. Sometimes you need a tote bag. For me, most often it's the days I don't work from home. In addition to the small items I usually stuff in a little handbag, I usually want to bring a lunch, a bottle of water, perhaps my knitting or reading, perhaps supplies for a class I'm teaching. So for this I have been relying on 3 dirty, ugly, ancient, a-little-too-small tote bags. None good enough to stand on its own.

So I made myself a damn beautiful tote bag. With all the bells and whistles.


You may recognize the fabric from last weeks apron DIY...


I just like it so much! And there's still plenty left. Who knows what else I'll use it for!?


A note about the Cut List: If your self fabric is directional, like mine, you'll want to cut two 16" x 19" pieces instead of one 16" x 38".


Left: Lining with Pocket; Right: Self with Pocket and Strap

The first step is to assemble all the bells and whistles. Sew on all your pockets and straps before we complicate things by sewing them together and making them not flat anymore.

You may also note that I matched my fabric for that front pocket. Because I love that kind of stuff. It's all in the details, my friends!


1. This is where you should be: front and back assembled with straps and pocket.
2. Topstitch bottom reinforcement pieces to the precise center of the body, and the bottom of the side pieces. The easiest way to do this is to press your raw edges in before sewing.
3. Sew your sides in. Be careful around those tricky corners! Repeat this step with your lining, but leaving a hole somewhere to flip your bag right-side-out through.
4. To attach lining: Place your right-side-out, fully assembled bag inside your inside-out lining and sew the top edges together.
5. Pull your bag through the hole you left in the lining and close up the hole with a topstitch. Push your lining its proper place inside your bag. Press and topstitch the top edge of your bag.


Beautiful, isn't it?


Monday, November 26, 2012

Turn a Mason Jar into a Travel Mug: Knit it a Cozy!

As they say, necessity is the mother of invention. A few weeks ago I was rushing off to work at some ungodly hour of the morning, made myself some coffee, but WHERE IN GOD'S NAME IS MY TRAVEL MUG??? So I dumped it into a mason jar and played hot potato all the way to work. And I thought, "Gee. This would actually make a pretty decent travel mug if I just knit it a little sweater..."

I am, of course, not the first one to think of this. I went home and pulled up dozens of them in a Google search, even specially designed lids for the express purpose of turning mason jars into travel mugs (from Cuppow, a company birthed for this product alone).

You can also turn a mason jar into a travel cup for cold drinks, but creating a hole in the lid for a straw. Here are three slightly different, but equally wonderful ways of doing it:

with a metal washer, from Fine and Feathered
with a rubber grommet (spill-proof!), from The Chick n Coop
with a plastic yogurt lid, from Crunchy Can Feel Good

For the love of mason jars! This is a great little knitting project for your scrap yarn; I finished mine in under 3 hours!


Gauge: 15 sts = 4 inches

On size 8 double pointed needles, CO 14 sts on each of your 3 needles (42 sts).
Join your first round and knit in a 1 x 1 rib for 5 more rounds.

Switch to size 9 double pointed needles.

Make 1 st at the beginning of your sixth round. (As you continue with the k1, p1 pattern, this extra stitch will transform your 1 x 1 rib into a seed stitch.)


Continue in seed st until piece measures 5 1/2" from CO.

Flat Jar Bottom: 
Knit 1 round in stockinette stitch.
*K1, k2tog, rep to end of round.
K 1 round
*K2tog, rep to end of round
K 1 round

Cut your yarn, leaving a tail of at least 6". Using a tapestry needle, thread this tail through your remaining stitches and remove the needles. Pull the yarn towards the inside of the cozy until the hole closes. Weave in the remaining tail of yarn and snip off the excess. Weave in the tail from cast on edge, and you're finished!


A note about knitting on double pointed needles:

A lot of people are afraid of double pointed needles. If this is you, trust me! They aren't nearly as scary as people make them out to be. The most difficult part is keeping your stitches tight between needles. So just pull tight between needles and everything will be okay. Be adventurous! Give it a try! However, if you don't want to, this same pattern could be knit on straight needles, then sewn up the side. Leave a longer tail at the end, and after you close up your last stitches, use this tail to sew the sides together. Piece of cake!


With love,


Wednesday, November 21, 2012

Wear Your Apron Low: Make an Apron You'll Love to Wear!

It's apron season! Love your apron! The best aprons are both practical for the kitchen and pretty enough to wear all night. So for Thanksgiving I've prepared you all a quick and simple apron DIY!


You can either trace an apron you already have that you like the fit of, or you can easily create your pattern directly on the backside of you fabric with a ruler, tape measure, tailor's chalk, and french curve.


With any symmetrical pattern, it is always best to draw out only half, then cut on the fold, you know it's perfectly symmetrical.

Start by standing in front of a mirror with a tape measure...

How wide do you want the bib to be?
How wide do you want the waist/body to be?
How long do you want the bib to be? (I always like to wear my aprons folded at the waist, so I added a few extra inches here)
How long do you want it to fall from the waist?

Using these measurements, draw out your apron pattern as in the above image, smoothing the corner between bib and waist to a curve with a french curve.

Fold at your center front line and cut.


Hem in all the edges around your apron.

Now for ties and pockets!


Ties can be made from twill strapping or a sturdy ribbon, if you have it, or you can make them from fabric. To make your ties, cut them to desired length + 4", and three times desired width. Iron and sew them as shown above, folded in half, with raw edges turned and sandwiched inside.


Cut pockets to desired width + 1" and desired height + 1 1/2". Fold and iron raw edges towards the inside on sides and bottom. Hem in top edge. Don't forget to sew the top edge (and only the top edge) before attaching the pocket to your apron.


Sew on ties with an X in a box!


Divide large pockets into sections to make them more useful!


Angle waist ties for a more flattering fit!


Ready for cooking!


Happy Turkey Day,


Tuesday, November 20, 2012

Knitting in Progress: Baby Smock Dress

I am seriously behind on my knitting. I've been working on this smock dress for my cousin's new baby since July. I intended to give it to newborn Eva. Now I'm just hoping I can get it to 6 month old Eva for Christmas. Good thing I knit it in the biggest size!


This is the pattern, from Debbie Bliss...


Excruciatingly adorable, right?

I altered it slightly, using a different smocking stitch...


This is my new favorite stitch pattern. It's much easier to keep track of than the cabled version that Debbie Bliss provides. It requires practically no counting at all!

Ribbed Smock Stitch
Knit over a multiple of 8 sts + 2 sts.

Row 1: *p2, k2 to last 2 sts, p2.
Row 2: *k2, p2 to last 2 sts, k2.
Row 3: rep row 1
Row 4: rep row 2
Row 5: *p2, wrap 6 sts, k2tog, k1, p2, k2 to last 2 sts, p2.
Row 6: rep row 2
Repeat rows 1 - 4
Row 11: p2, k2, *p2, wrap 6 sts, k2tog, k1, p2, k2 to last 2 sts, p2
Row 12: rep row 2

To clarify rows 5 and 11:
To wrap 6 sts, insert your right needle between the sixth and seventh stitch on your left needle. Wrap your yarn around your right needle as if knitting normally. Pull this yarn back through and place the loop back on your left needle. After wrapping stitches, you will always k2tog, knitting this extra loop you've created in with the next proper stitch, so as not to add stitches. This is the stitch that creates the smock effect. Otherwise, this stitch pattern is nothing but a 2x2 rib, plain and simple!


With love,


Monday, November 19, 2012

2013 Day Planner DIY and Freebie!

I have something very exciting to share with you!

Given my recent explorations into bookbinding, I decided to make my day planner this year. I've been using the Moleskine version for years, which I like, but you know, there are a few things I'd do differently if I made it myself. So I spent a whole bunch of hours creating a document that you and I both could print out, slice up, and bind into your very own, homemade 2013 day planner. Choose your paper, choose your cover, assemble and enjoy!

Click the image below to download your very own printable planner pages...


Things to know about using this document:


  • It should be printed double-sided.
  • Every double-sided page = 8 book pages. Every printed page needs to be cut in half, hamburger-wise. (If you remember kindergarten perhaps you understand... If you're printing on 8 1/2" x 11" pages, each page will become two 8 1/2" x 5 1/2" pieces of paper.)
  • To ensure your calendar remains in calendar-order, pay careful attention while constructing your signatures. This document assumes signatures of two full, double-sided printer pages, a.k.a. four pieces of cut, 8 1/2" x 5 1/2" paper. They are ordered as intuitively as possible, I hope: 
    • Take your first two full, double-sided pages, cut in half. Stack the top half of page 1 on top on the bottom half of the same page. Stack these two on top of the top half of page 2, and finally stack them all on top of the lower half of the second page. Fold this stack in half to create your first signature. (See image below) Repeat until you've grouped and folded all pages into signatures.


If you don't know how to assemble your signatures into a text block, check out my tutorial from September:


For my cover, I pulled out the sewing machine, some brown suede and blue binding, and put together a cute little envelope cover. Remember to make your cover about 1/4" bigger than your text block, all the way around, and get creative!


With love,


Sunday, November 18, 2012

Autumn Leaves: Part Two

So I've finally finished and hung my pressed leaves!


Click here to see Part One:


What I've learned: definitely label BEFORE you glue. Oops!

I was hoping to label them all like this:


But of course rolling my already glued leaves through the typewriter would have destroyed them. (Duh.)


Another thing I learned: When hanging anything with a single pushpin, make sure it's exactly in the middle!


And yet another thing I learned: I may have unconciously stolen this idea. I was cleaning my room the other day and found this:


Thanks, Country Living!


Love,


Friday, November 16, 2012

Blanket Sweater, Take 2

After I posted yesterday I was biking to work and had a brilliant idea! I wanted to give my blanket sweater another shot after I botched it the other day, and it occurred to me that I had a big, hole-y blanket slated for the trash. It's a comfy, white cotton blanket with a great drape.

So that's what I used for Take 2: Success!


If you didn't read about my inspiration and first attempt, find it here...!


Note: I originally put together this tutorial while making my first version, so the images a mash up of the two... I hope it isn't confusing!


A note about choosing a pattern: 

Perhaps you have a simple jacket pattern filed away somewhere with a one-piece sleeve. This is the ideal.

Perhaps you have a sloper. This is what I used, leaving an inch all the way around to account for comfy-fit ease and seam allowance. It worked like a charm.

Perhaps you have a pattern of some other kind with a one-piece sleeve. This shouldn't be a problem, just take the fit of the pattern into consideration and cut it bigger if appropriate to allow for a loose fit.

Perhaps you only have patterns for sleeves with cuffs or short sleeves. I wouldn't recommend this unless you know what you're doing, but you could perhaps use the cap and extend the sleeve length.

You will also need the front and back bodice pieces from the same pattern to create your armhole.


The Basic Measurements:


Obviously, these are up for interpretation if you aren't a size 8 or want it to fit differently than mine.


To begin, cut and finish any raw edges on your main rectangle.


To Assemble Your Sleeves:


***With fabrics that have indistinguishable front and back sides, be sure you sew them opposite, so you have one left and one right sleeve!


Now this here is a make-it-or-break-it (as I learned)...


1. Fold your main rectangle in half lengthwise.

2. Measure down 11" from the top, and over 9" from the fold. This is the top center of your armhole.

3. Using the front and back bodice pattern pieces from the same pattern you snatched your sleeve from, place the back bodice piece parallel to your center fold with the top corner of the armhole at the point you've measured, 11" down and 9" over.

4. Place the front bodice piece so that together they create a nice armhole shape. (Mine are so far apart because I added ease to my sleeves when I cut them out).

5. Mark this shape with tailors chalk, rounding out any harsh corners.

6. Cut along your chalked line, through both sides.


Sleeve Set:


1. Check for where you marked your sleeve cap. One notch means it goes towards the front, two means it goes towards the back. Make sure you have left and right sleeves on the appropriate sides.

2. With your sweater body inside out, and your sleeve right side out, match the sleeve to the armhole, underarm down, sleeve cap up.

3. Start pinning at the underarm. Pin the sleeve flat to the body in the underarm. Pin from inside the sleeve to the body, so that you can easily remove the pins as you sew.

4. If your sleeve cap is bigger than your armhole, this is okay! This is called ease. Ease should be evenly distributed between your front and back notches.


As an old teacher of mine used to say, sew as if your presser foot is a hamster and your armhole is a wheel. This is to avoid accidents like puckers and catching other parts of your sweater in the seam.


Congratulations! You're finished!


With love,


Thursday, November 1, 2012

Autumn Leaves, Pressed and Pretty

Upon the coming threats of Hurricane Sandy last Sunday, I made the last minute decision to hop in my boyfriend's truck and hitch a ride up to Northampton, Massachusetts with him. Given the devastation to New York City public transportation, I ended up with a week-long Western Mass vacation! And coming from my cement jungle, I couldn't help but notice the beautiful autumn foliage. Walking the path between my boyfriend's home and downtown Northampton, picking up colorful leaves was just about impossible to resist.

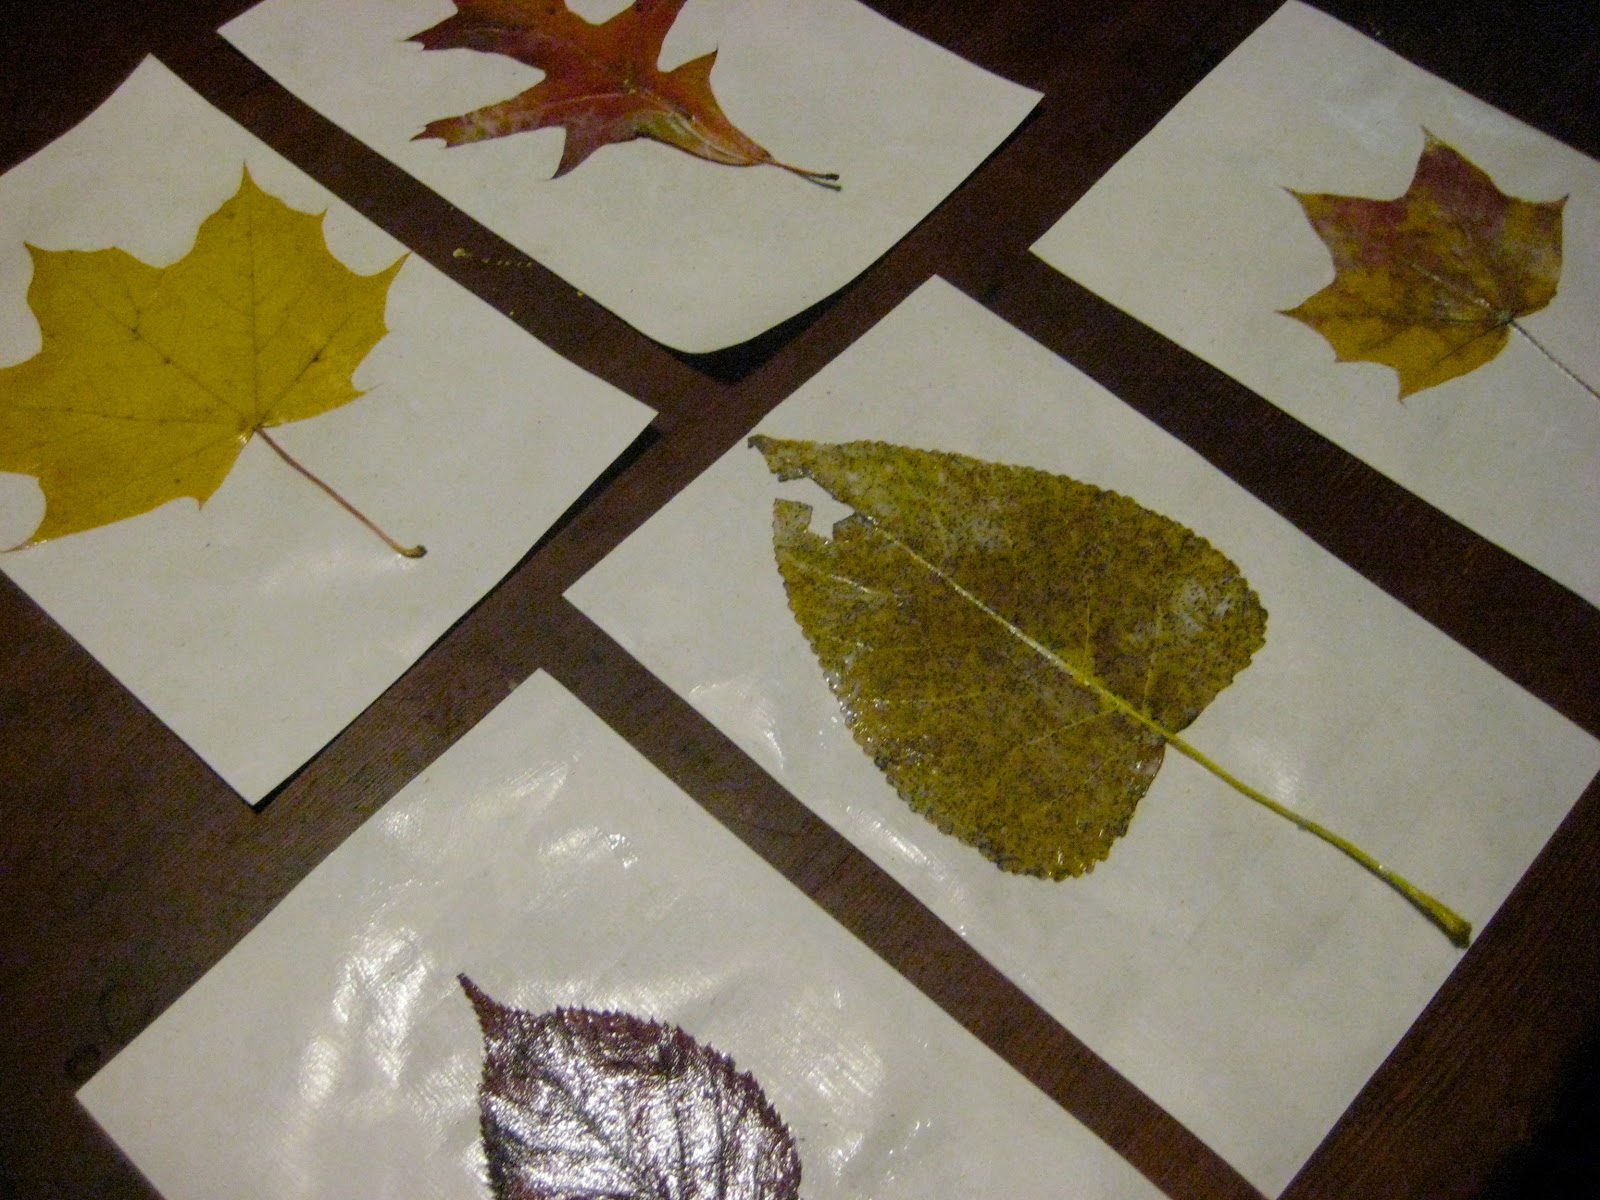
What to do with them? Press them, of course! Fast and beautiful art.


Place your leaves neatly between the pages of a book.


Close up your book and put it at the bottom of a pile of books. The heavier the better! Leave them there for a few days to get good and flat.

Now brush a healthy coat of Mod Podge (or similar glue/sealer) on your paper, underneath where you will place the leaf.


Quickly! Before it dries! Place your leaf where you'd like it on the page and seal it with a full coat of Mod Podge. For a consistent finish, coat the entire surface of the page.


Give your leaf another coat or two, until it is satisfactorily glued to the page.


After they're dry, put them back under that pile of books for a few days if your paper curled from the glue. And once I get home to my calligraphy pens, I think I might label my leaves in pretty cursive for a little extra something.


I picked up this beauty today, so it's not ready quite ready for gluing. But I'm excited about it! I love the contrast of all those itty bitty leaves to my large, singular leaves. And that it will run off the page at the edges. A bit unexpected, I think.


Frame, or just hang up with push pins or binder clips for some beautiful fall wall art! I'll post pictures once I get mine finished and hanging.


With love,


Click here to see the finished product...


For more on pressing, check out last spring's flower pressing post...