Showing posts with label home. Show all posts

Tuesday, April 23, 2013

Embroidery Hoop Clock

I love making things that are practical, things I will definitely use. And I love clocks, both for their aesthetic and practical offerings. I especially love making clocks because it's as easy at slapping a movement and some hands on anything you can sandwich in between them.

Your clock face must be:

Flat enough for the hands to move freely, 360 degrees.
Thin enough to receive the shaft of your movement (which come in a variety of lengths).
Penetrable enough for you to make a hole through.

Movements and hands can be purchased online or at your local clock shop. Now start sandwiching your way to a home full of beautiful and intriguing clocks!

My most recent clock creation, and my favorite to date I made on a embroidery hoop.


What You'll Need

Embroidery hoop
Fabric
Fusible interfacing
Embroidery floss
Sewing needle
Graph paper
Pencil
Ruler
Batting
Clock movement & hands


1. Begin by fusing your interfacing to the back of your fabric with a hot iron. Place your interfaced fabric in the embroidery hoop and fasten until taught.


2. For cross-stitched numbers on a fabric that isn't clearly gridded, you can use graph paper to block out your numbers.

  • Pin these blocked out numbers to the appropriate place on your clock face (take note of the grain of the fabric and align the numbers with it). 
  • Embroider through the paper.
  • Tear away the paper from finished numbers.
  • Tighten up any stitches that were loosened by tugging at them from the underside.


I wouldn't recommend this method for any design denser than mine, as it may be difficult to remove all the paper. For more intricate designs, it's best to use cross-stitch fabric.


3. Measure out and embroider the ticks between the cardinal numbers.


4. To finish the back, trim the edges of your fabric to be a circle big enough to enclose the back without overlapping at the center (which would create too much bulk and prevent your clock from hanging straight on the wall). Add the batting. Make a long running stitch around the outer edge of the fabric.


5. Pull your thread tight so that the fabric gathers up towards the middle of the back. Wait to tie this thread off until your movement is in place.


6. To make the hole in the center, be very careful not to make too big a hole. I started my hole with a awl, pushing the fibers apart, instead of cutting them. I then eased the shaft up through the hole, making four tiny snips around the edges so that I could get it all the way through.


7. Finesse the movement, batting, and backing until everything sits nicely. Add hands and you're finished!


With love,

Melody

Friday, November 30, 2012

Bless this House: Visible Storage

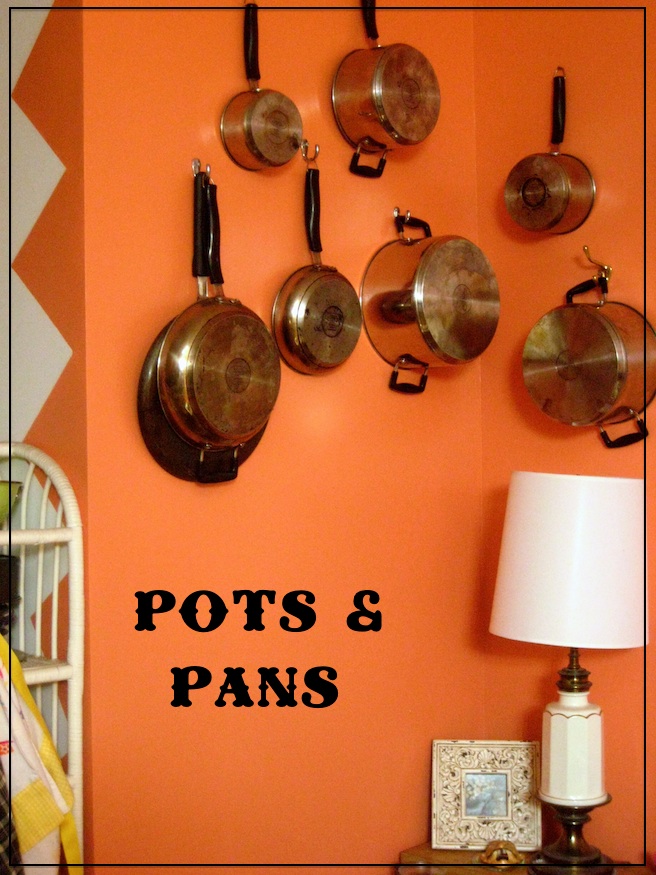
I've been seeing it all over the pages of Country Living and House Beautiful and the like: visible storage. It's cool to take the doors off you cupboards, replace cabinets with shelves and hang your possessions on the walls like art.


Of course, as a New Yorker with a habit of accumulating, visible storage is just about the only option. The added benefit is that your things become more organized! Spread things out, you don't have to be confined to cabinet space anymore. Put them in pretty jars with hand-punched labels. Hang your pans on the wall, and you'll never again have to take them all out just to get to the big one on the bottom.

But the real reason I do it is because I like my home to be busy and colorful, full of texture and pattern.  Why hide away all your things in closets and then wonder where to find art for the walls? The things you already own and use might be just the thing to bring some life to your home!


Happy Friday!


You can find the previous installments of Bless this House here:


Thursday, November 29, 2012

Dream Tote!

I have a lot of stuff. Too much stuff. Especially in my closet. A year or so I had a revelation concerning all this stuff. A lot of it I rarely wear or use, but when I try to get rid of these things I can't. Why? Because they still serve a purpose or fill a hole. You need to fill that hole with one beautiful, well-made item so that you can get rid of a host of sub-par items that have been serving that purpose together.

For example, my tote bag situation. Sometimes you need a tote bag. For me, most often it's the days I don't work from home. In addition to the small items I usually stuff in a little handbag, I usually want to bring a lunch, a bottle of water, perhaps my knitting or reading, perhaps supplies for a class I'm teaching. So for this I have been relying on 3 dirty, ugly, ancient, a-little-too-small tote bags. None good enough to stand on its own.

So I made myself a damn beautiful tote bag. With all the bells and whistles.


You may recognize the fabric from last weeks apron DIY...


I just like it so much! And there's still plenty left. Who knows what else I'll use it for!?


A note about the Cut List: If your self fabric is directional, like mine, you'll want to cut two 16" x 19" pieces instead of one 16" x 38".


Left: Lining with Pocket; Right: Self with Pocket and Strap

The first step is to assemble all the bells and whistles. Sew on all your pockets and straps before we complicate things by sewing them together and making them not flat anymore.

You may also note that I matched my fabric for that front pocket. Because I love that kind of stuff. It's all in the details, my friends!


1. This is where you should be: front and back assembled with straps and pocket.
2. Topstitch bottom reinforcement pieces to the precise center of the body, and the bottom of the side pieces. The easiest way to do this is to press your raw edges in before sewing.
3. Sew your sides in. Be careful around those tricky corners! Repeat this step with your lining, but leaving a hole somewhere to flip your bag right-side-out through.
4. To attach lining: Place your right-side-out, fully assembled bag inside your inside-out lining and sew the top edges together.
5. Pull your bag through the hole you left in the lining and close up the hole with a topstitch. Push your lining its proper place inside your bag. Press and topstitch the top edge of your bag.


Beautiful, isn't it?


Tuesday, November 27, 2012

It's Beginning to Smell a Lot Like Christmas

What smells more like Christmas than cloves and oranges? Okay, maybe pine does, but it's a darn close call! I don't know about you, but I'm getting in the spirit with some classic orange and clove room fresheners. If you've never made them before, do yourself a favor!


1. Wrap up an orange with string like you would ribbon on a present, leaving nice long tails.

2. Tie off those tails into a loop for hanging.

3. Push cloves into the orange around the string so it doesn't slip off.

4. Push lots of cloves into the orange however you please.

5. Hang up and breathe deep!


Monday, November 26, 2012

Turn a Mason Jar into a Travel Mug: Knit it a Cozy!

As they say, necessity is the mother of invention. A few weeks ago I was rushing off to work at some ungodly hour of the morning, made myself some coffee, but WHERE IN GOD'S NAME IS MY TRAVEL MUG??? So I dumped it into a mason jar and played hot potato all the way to work. And I thought, "Gee. This would actually make a pretty decent travel mug if I just knit it a little sweater..."

I am, of course, not the first one to think of this. I went home and pulled up dozens of them in a Google search, even specially designed lids for the express purpose of turning mason jars into travel mugs (from Cuppow, a company birthed for this product alone).

You can also turn a mason jar into a travel cup for cold drinks, but creating a hole in the lid for a straw. Here are three slightly different, but equally wonderful ways of doing it:

with a metal washer, from Fine and Feathered
with a rubber grommet (spill-proof!), from The Chick n Coop
with a plastic yogurt lid, from Crunchy Can Feel Good

For the love of mason jars! This is a great little knitting project for your scrap yarn; I finished mine in under 3 hours!


Gauge: 15 sts = 4 inches

On size 8 double pointed needles, CO 14 sts on each of your 3 needles (42 sts).
Join your first round and knit in a 1 x 1 rib for 5 more rounds.

Switch to size 9 double pointed needles.

Make 1 st at the beginning of your sixth round. (As you continue with the k1, p1 pattern, this extra stitch will transform your 1 x 1 rib into a seed stitch.)


Continue in seed st until piece measures 5 1/2" from CO.

Flat Jar Bottom: 
Knit 1 round in stockinette stitch.
*K1, k2tog, rep to end of round.
K 1 round
*K2tog, rep to end of round
K 1 round

Cut your yarn, leaving a tail of at least 6". Using a tapestry needle, thread this tail through your remaining stitches and remove the needles. Pull the yarn towards the inside of the cozy until the hole closes. Weave in the remaining tail of yarn and snip off the excess. Weave in the tail from cast on edge, and you're finished!


A note about knitting on double pointed needles:

A lot of people are afraid of double pointed needles. If this is you, trust me! They aren't nearly as scary as people make them out to be. The most difficult part is keeping your stitches tight between needles. So just pull tight between needles and everything will be okay. Be adventurous! Give it a try! However, if you don't want to, this same pattern could be knit on straight needles, then sewn up the side. Leave a longer tail at the end, and after you close up your last stitches, use this tail to sew the sides together. Piece of cake!


With love,


Wednesday, November 21, 2012

Wear Your Apron Low: Make an Apron You'll Love to Wear!

It's apron season! Love your apron! The best aprons are both practical for the kitchen and pretty enough to wear all night. So for Thanksgiving I've prepared you all a quick and simple apron DIY!


You can either trace an apron you already have that you like the fit of, or you can easily create your pattern directly on the backside of you fabric with a ruler, tape measure, tailor's chalk, and french curve.


With any symmetrical pattern, it is always best to draw out only half, then cut on the fold, you know it's perfectly symmetrical.

Start by standing in front of a mirror with a tape measure...

How wide do you want the bib to be?
How wide do you want the waist/body to be?
How long do you want the bib to be? (I always like to wear my aprons folded at the waist, so I added a few extra inches here)
How long do you want it to fall from the waist?

Using these measurements, draw out your apron pattern as in the above image, smoothing the corner between bib and waist to a curve with a french curve.

Fold at your center front line and cut.


Hem in all the edges around your apron.

Now for ties and pockets!


Ties can be made from twill strapping or a sturdy ribbon, if you have it, or you can make them from fabric. To make your ties, cut them to desired length + 4", and three times desired width. Iron and sew them as shown above, folded in half, with raw edges turned and sandwiched inside.


Cut pockets to desired width + 1" and desired height + 1 1/2". Fold and iron raw edges towards the inside on sides and bottom. Hem in top edge. Don't forget to sew the top edge (and only the top edge) before attaching the pocket to your apron.


Sew on ties with an X in a box!


Divide large pockets into sections to make them more useful!


Angle waist ties for a more flattering fit!


Ready for cooking!


Happy Turkey Day,


Tuesday, November 20, 2012

Bless this House: Entertainment Center

I love rearranging furniture. It breathes a whole new life into a room and costs nothing! Now, if you're thinking, "I would, but I just don't think my furniture would fit or look good any other way..." Cut the crap, sister. I have spent the entirety of my adult life in minuscule NYC apartments, and I have a TON of stuff. And I still rearrange on the reg. Even when I think there's no other way, I push some things around, and BAM! Who knew?

The point is, the last time we rearranged, we took things to a whole new level. It literally blew my mind how great the new arrangement was and how not possible I thought it was when we started. One product of that rearrangement was the Entertainment Center.

It isn't an entertainment center the way you might think of one. It's more like a quick and dirty, rental apartment solution to the ugly electronics we can't live without.


We just clustered them all together! Why didn't we think of it sooner??? With the aid of nothing but a little bitty end table and a simple shelf, we transformed what used to be a smattering of small eyesores into one larger, more acceptable piece of "furniture". That typewriter really did a lot. I couldn't stand the sight of that cheap, ugly keyboard until it was paired with a lovelier set of keys.


With love,